Arrangement Assistant

Arrangement Assistant is offered as a companion to your Halcyon Platinum system that provides a more family-friendly, simplified version of your system designed to be used during the arrangement process.
Click the logout icon  to log out of Arrangement Assistant.
Clicking the home icon  will return you to the Arrangement Assistant home screen (above).
Click the question mark icon for help.
You may create a new arrangement by selecting "New Arrangement" and entering the required information. Click "Search Existing Records" to select from your existing clients.
You will see some tabs you are familiar with from your main Halcyon system- Biography, Services, Obituary, and Purchases. These screens will function similarly to those in your main system as well.
The Remembrances, Family & Friends, Packages, and Summary tabs are unique to the Arrangement Assistant.
Remembrances

The Remembrances tab contains questions that can be maintained via the System Management option. These questions may be designed to better get to know the family and their loved one.
Biography

The biography tab is where you keep track of biographical information. Like in your main Halcyon Platinum system, you are able to manage field visibility (including which fields are visible/required) via your System Management options. You may click the "Show All Data Fields" button to display all data fields.
Checking the "Provided Later" box next to a field will add it to your Summary screen in a section labeled "Information to Be Provided Later". You will be able to send the family access to securely submit the requested information using a password provided by you. See the Summary section of this page for more information about missing information requests.
Family & Friends

The Family & Friends tab functions similarly to the Contacts tab in your main system.
Click "Add Individual" to add a contact. Use the appropriate checkboxes to mark the individual as Legal NOK, Primary Buyer, Informant, etc.
Click the edit icon to edit an existing individual, and click the trash can icon to delete it. Click the arrow next to an individual's name to expand the information about them.
You are also able to enter additional survivor, additional predeceased, and additional pallbearer information on this screen.
Services
This tab functions like the Services tab in your main Halcyon Platinum system. See the Services tab help section for more information.
Like in your main Halcyon Platinum system, you are able to manage field visibility (including which fields are visible/required) via your System Management options. You may click the "Show All Data Fields" button to display all data fields.
Like in the Biography tab, checking the "Provided Later" box next to a field will add it to your Summary screen in a section labeled "Information to Be Provided Later". You will be able to send the family access to securely submit the requested information using a password provided by you. See the Summary section of this page for more information about missing information requests.
Obituary
The Obituary tab allows you to create, save, email, print, and maintain photos for obituaries.
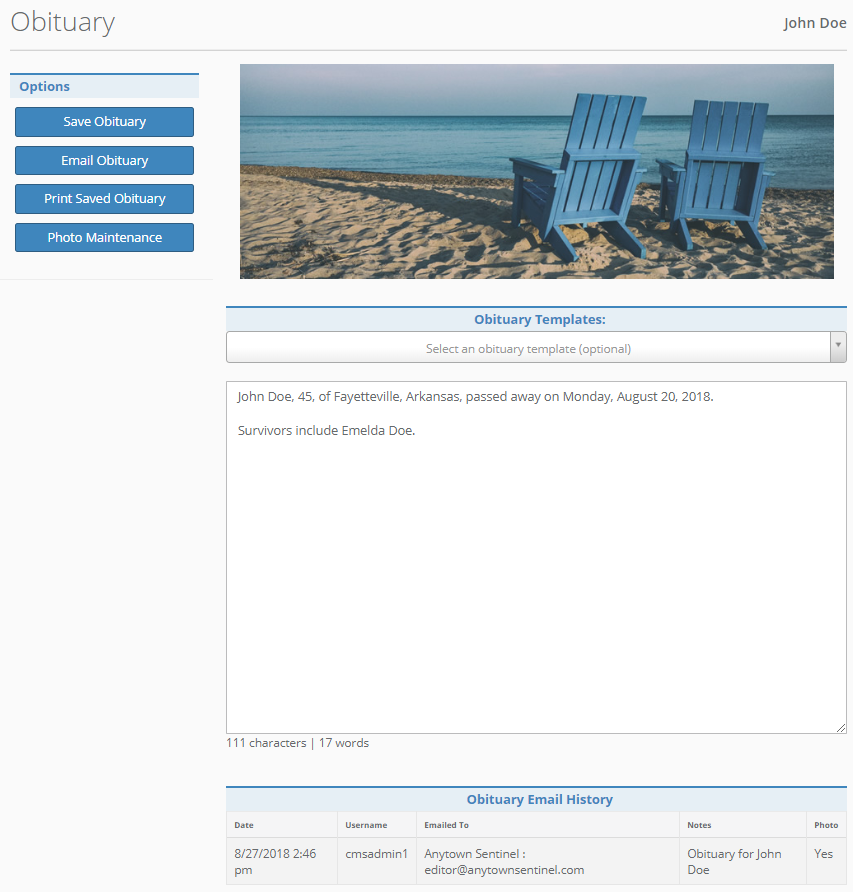
You can either type an obituary from scratch or create an obituary using one of your templates (these are maintained in your main Halcyon system- see the Obituary Template Maintenance help section for more information).
Click "Save Obituary" to save the obituary. Click "Print Saved Obituary" to save, and click "Photo Maintenance" to add or delete an obituary photo.
Click "Email Obituary" to email the obituary to one of your publishers (also maintained in your main Halcyon system) or manually enter a recipient. You may enter notes for the recipient and select a reply email address for the email. If you have added a photo to the obituary, this will be sent with the email. Obituary Email History will display below your obituary- showing the date/time, username, and email information for any obituary emails sent.
Price Groups
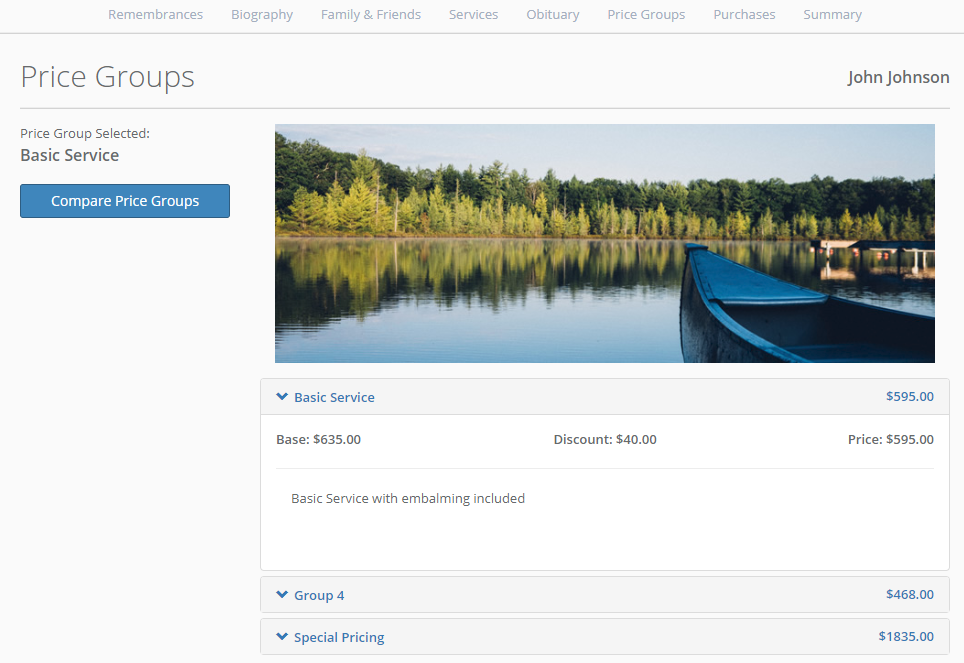
This tab will display any price groups from your system that you have set to be available for customer selection. These price groups and their descriptions are maintained in the Price Group Maintenance options in System Management, described further below.
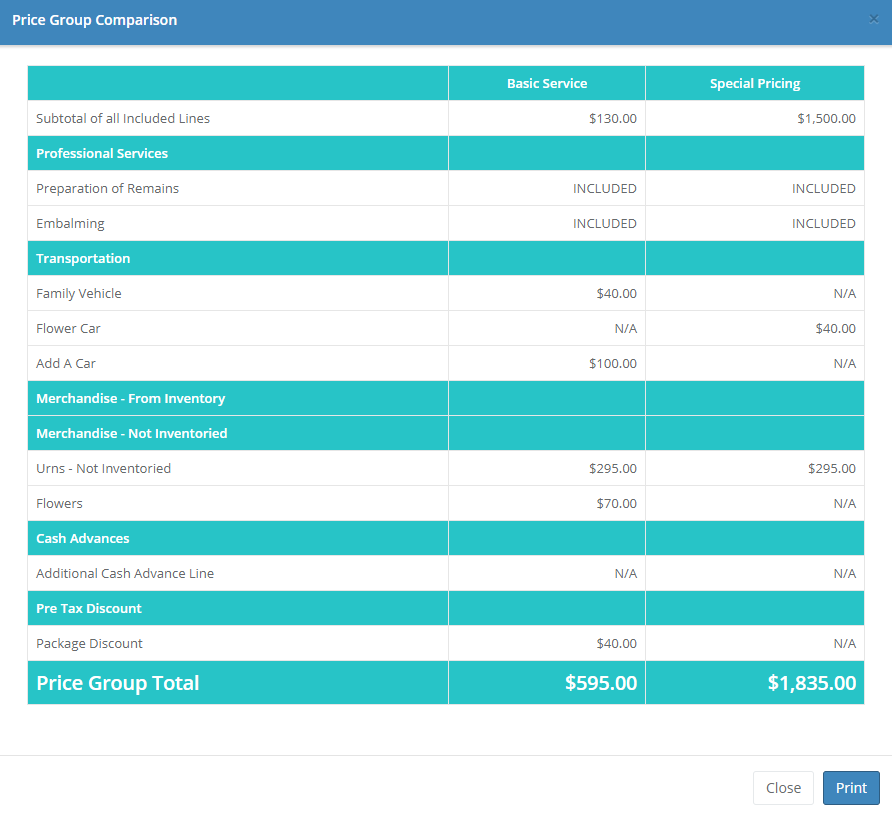
Click the "Compare Price Groups" button and check the desired price groups to display a detailed price group comparison. Click the "Print" button to print the comparison.
Purchases
This tab functions like the Purchases tab in your main Halcyon Platinum system. See the Purchases tab help section for more information.
Summary

The Summary tab is similar to the Case Overview tab in your main system. You will see a list of forms which you can maintain using the Maintain Forms Visibility option in System Management, described further below.
If you have any fields marked "Provided Later" on your Services or Biography tabs, you will see them listed on this tab. Enter the email address(es) to send your missing information request to (separate multiple addresses with commas). You will create a password for the family to use to access the secure online portal to enter missing information. You can optionally add additional messages or information to this email. Enter the address(es) of any funeral home staff to cc and receive replies for this email.
Click the "Save Information" button to save. "Print Information" will print the screen. Click "Email Request for Data" to send emails to the address(es) that you have designated.
System Management
Missing Information Maintenance
View/Import Missing Information Data Requests
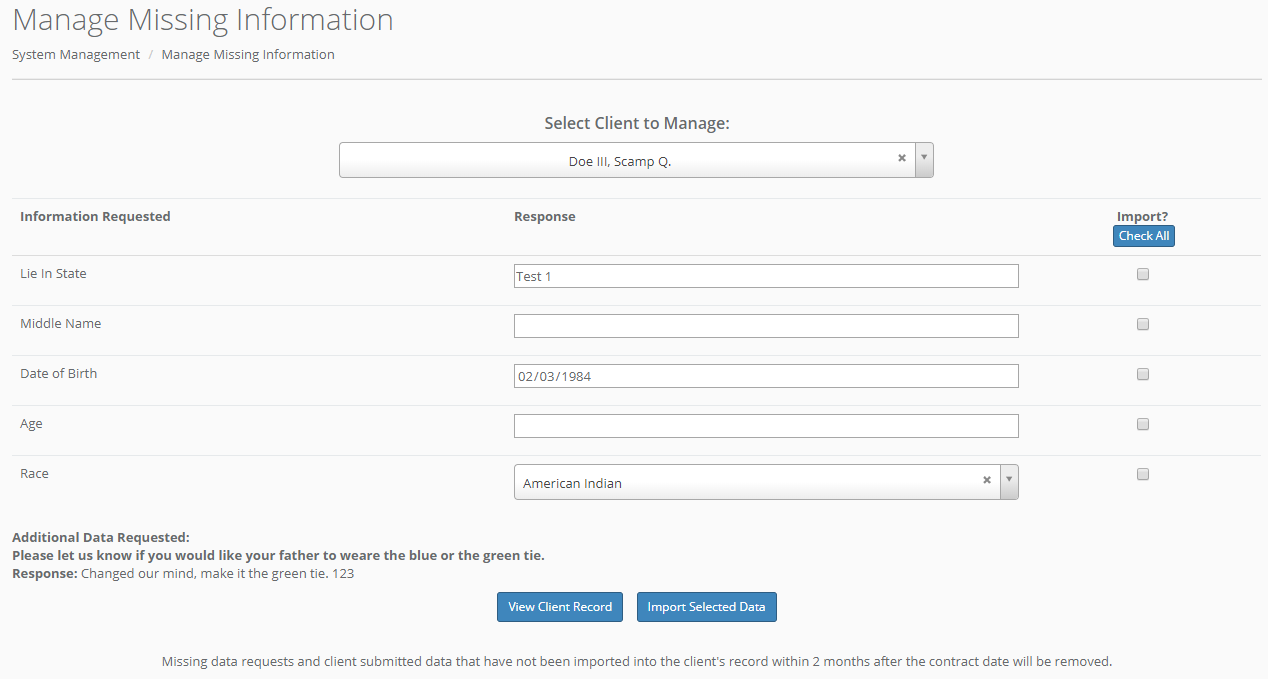
This option allows you to manage your missing information requests. Select from the dropdown list of clients with missing information requests. You will see any requests that you have sent for missing information and any responses that have been sent by the family. Check individual responses to import them or click "Check All" to check all responses for import. Click "Import Selected Data" to import your selected requests. Click "View Client Record" to be taken to the client's biography tab.
Edit Email Default Configuration

This option allows you to configure the content of your missing information request emails, as well as the default funeral home email address(es) that are used for replies and sent a copy of each request email sent. Enter your default funeral home email address(es), email closing, and body. Select whether you want to show the list of missing data fields in the body of your emails. Note that you will have the option to change any text or email addresses for each individual email before it is sent. Click "Update Email Information" to save.
Set Duration of Valid Client Logins
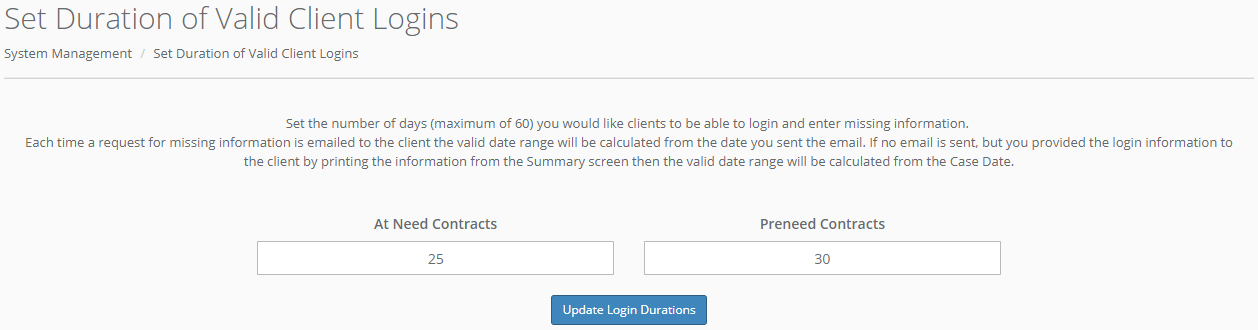
You can set the number of days that you would like a family's portal to be available for them to log in and enter missing information. You can set different ranges for your At Need and Preneed contracts. The valid date range for clients is calculated from the day the missing information request email is sent. If you choose not to send a missing information request email and instead provide the family with their login information from another method, the date range will be calculated by the case date.
Customize Family Login Welcome Page
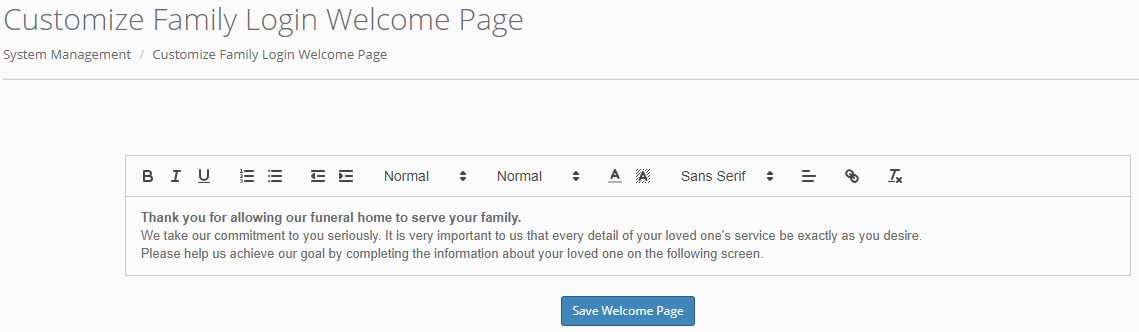
You can customize a message to display on your family login welcome page from this screen. Click "Save Welcome Page" to save your message.
Pre-Set "Provided Later" Fields
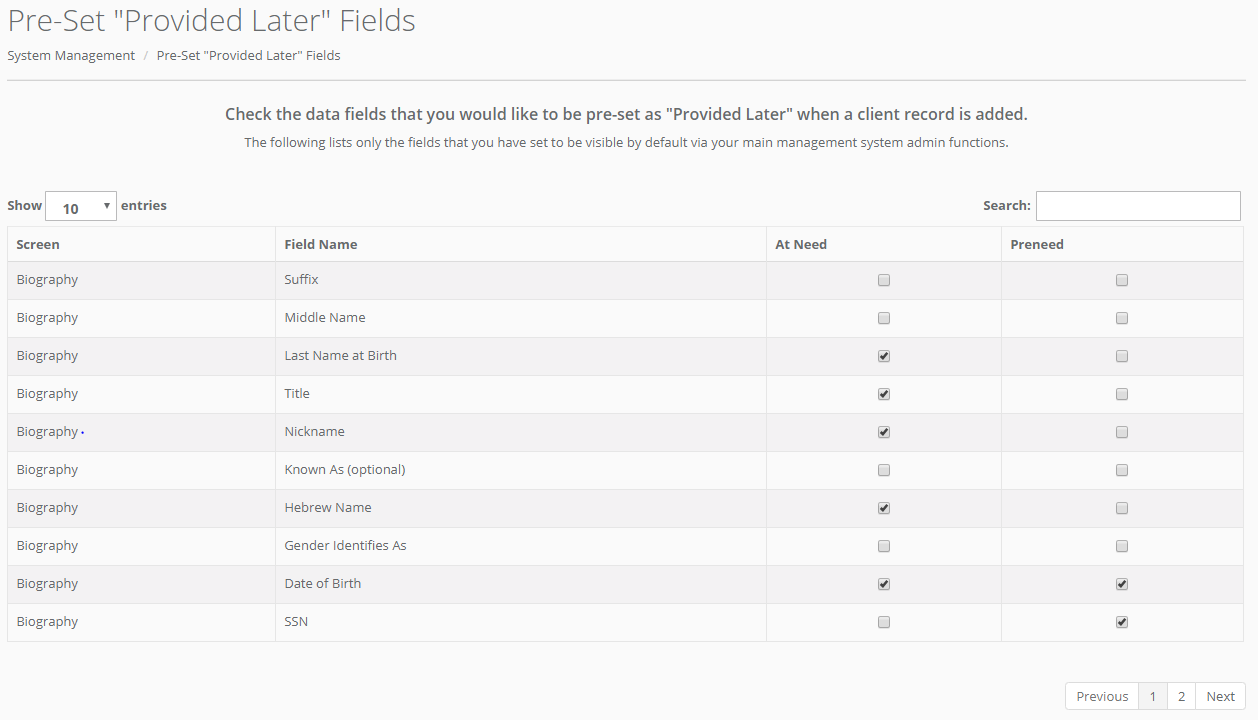
You can pre-set fields that you would like to be marked as "provided later" in Arrangement Assistant using this option. Note that you can only select from the list of fields that you have set to be visible by default via your main management system admin functions. Check the column for which case type(s) you would like the field to be marked as "provided later" for- At Need cases, Preneed cases, or both.
Remembrance Question Maintenance
 This screen lets you add, edit, or remove questions that appear on the Remembrances tab. Click the edit icon to change the text for a question, and click the delete button to delete the question. Please note that changing a question's text will change it for all clients- both future and past. If you delete a question it will still appear on a client's remembrance tab if it was previously answered. It will not appear for future cases or for previous clients who did not answer it.
You can add a new question by clicking "Add A Question". Click "Save" to save your question or "Cancel" to cancel adding the question. You can drag and drop questions into your desired display order and click "Update Display Order" to save.
Price Group Maintenance
Set Price Groups Available for Customer Selection
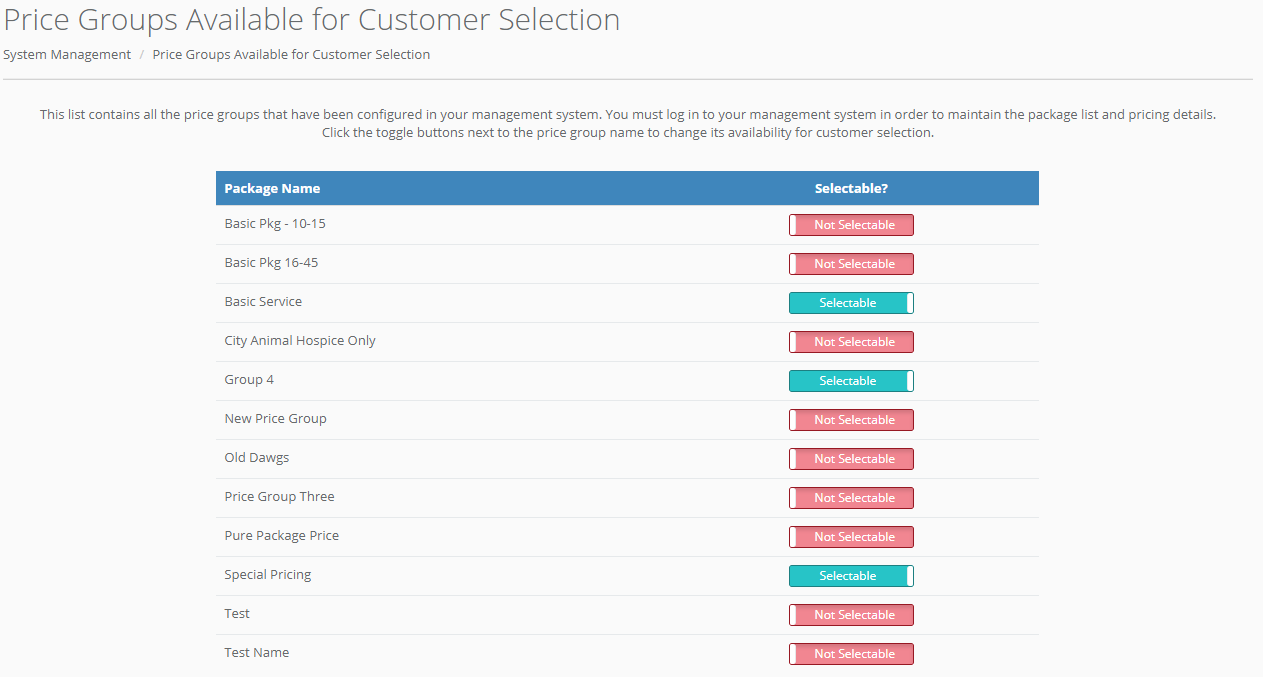
You can select which price groups you want to be available for customers to select in Arrangement Assistant using this option. Click the toggle button to mark a package as selectable in Arrangement Assistant.
Maintain Price Group Description

Any price groups that have been marked as available for client selection using the option above will be available on this screen for you to edit their descriptions. Note that you must be logged in to your management system to maintain the names and pricing details for your price groups. Enter your desired price group description and click "Save Description" to save your changes.
Customize Appearance
Customize Navigation
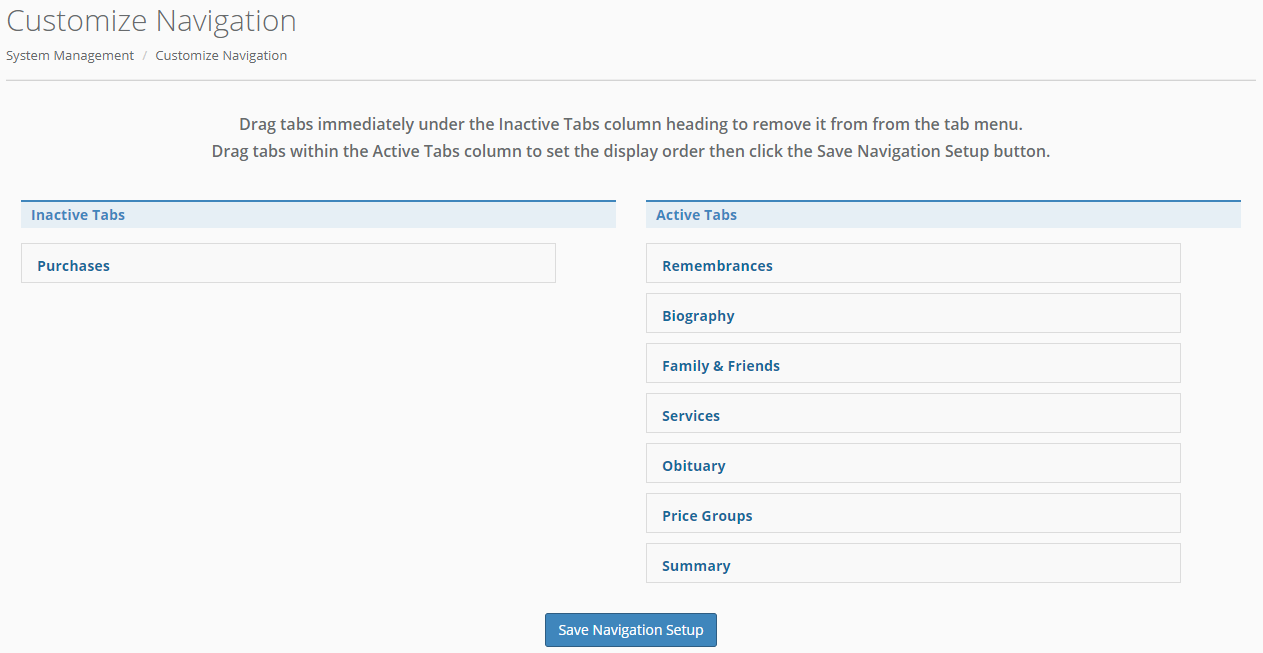
You can customize which tabs are visible in Arrangement Assistant from this screen. Drag a tab from the "Active Tabs" column to the "Inactive Tabs" to hide them from view in Arrangement Assistant. Click "Save Navigation Setup" to save your changes.
Set Main Panel Image

You can select which image you want to be available on the main panel when you first log in to Arrangement Assistant. Click the image from the image gallery to view a larger sized version of it and click "Save Selection" to select the image as your main panel image.
Data Entry Screens Image Maintenance
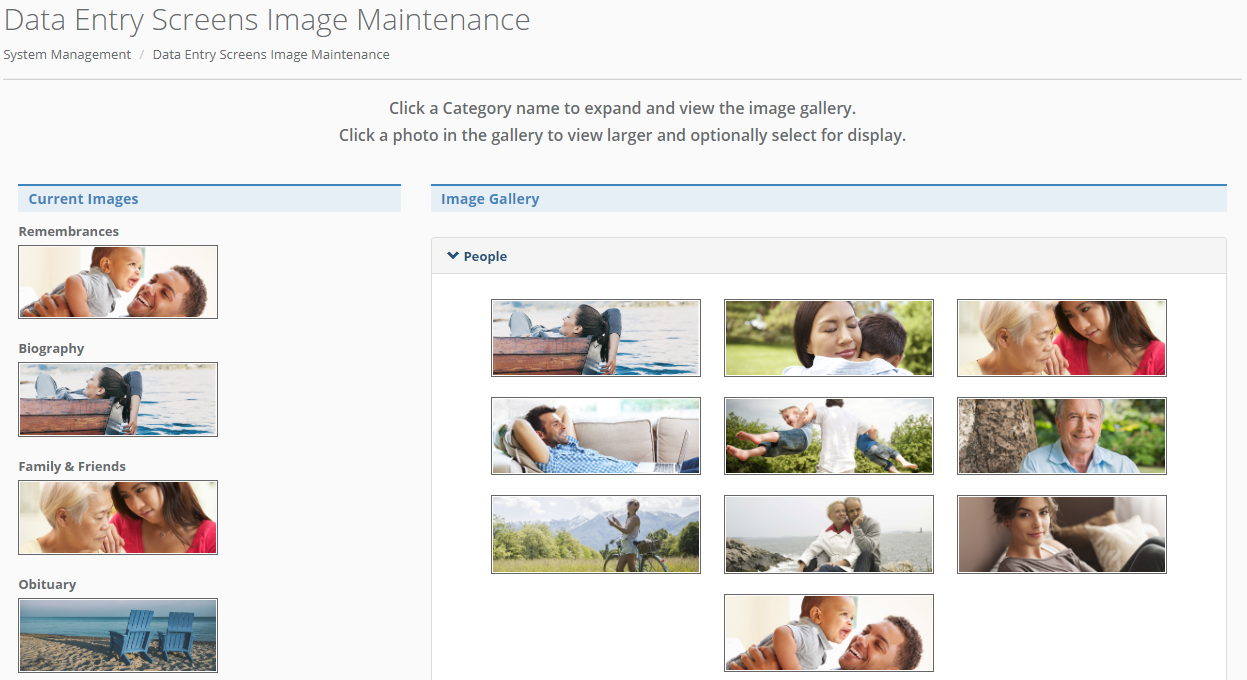
This option will allow you to select which images are shown for each tab in Arrangement Assistant. Select an image category (People, Scenery, Flowers, or Miscellaneous) to view the options available. Click an image to view an expanded version and select a tab for image display. Click "Save Selection" to save your image selection.
Show/Hide Contract Number in Header
This option allows you to select whether you want the contract number to display with the case name in the header throughout Arrangement Assistant.
Forms Visibility
Maintain Forms Visibility
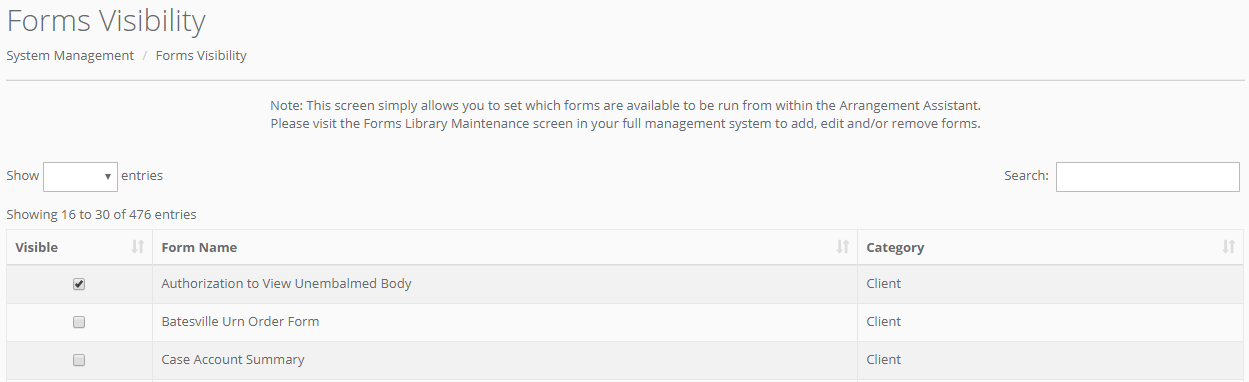
The Forms Visibility maintenance in Arrangement Assistant functions just like the option in your management system- you can search our library of available forms and select the "Visible" checkbox to select the form for visibility in Arrangement Assistant.
Field Visibility
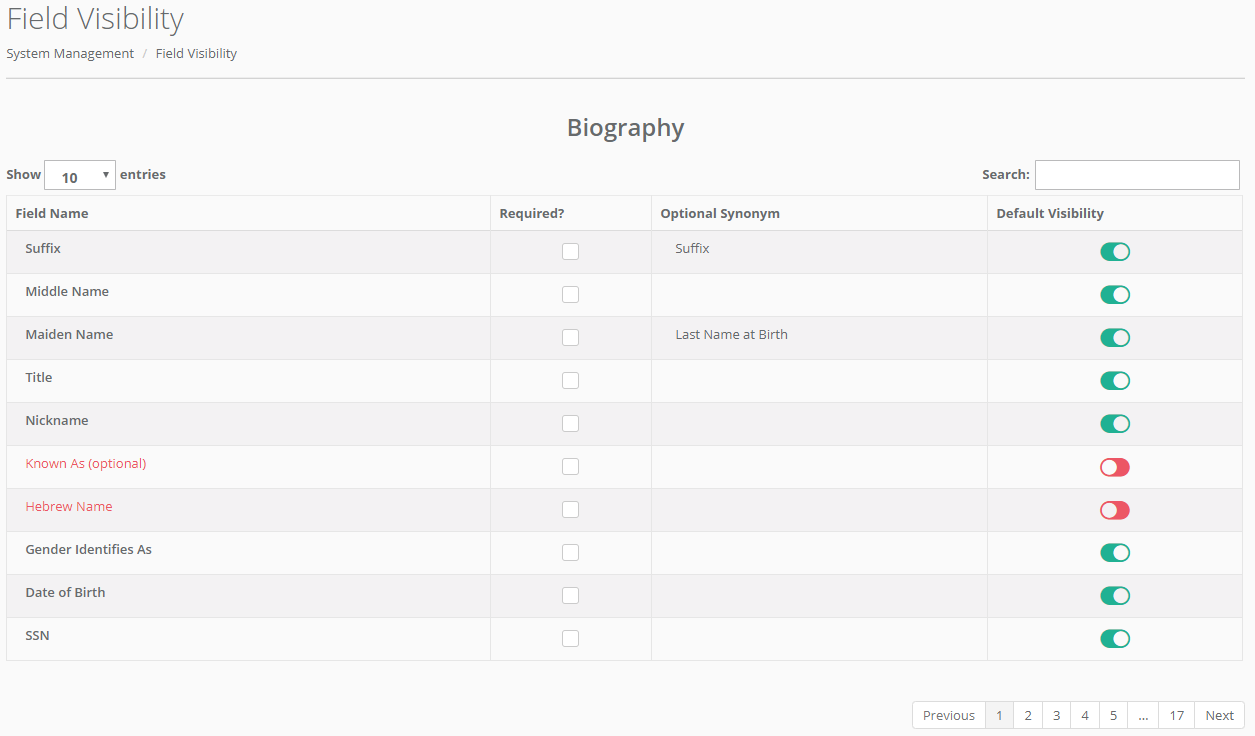
Like in your management system, you can select which fields you want to be visible on your Biography and Services tabs. Toggle the default visibility switch to show/hide a field, and click the "required" checkbox to mark a field as required.
Comments
0 comments
Please sign in to leave a comment.