Account Register
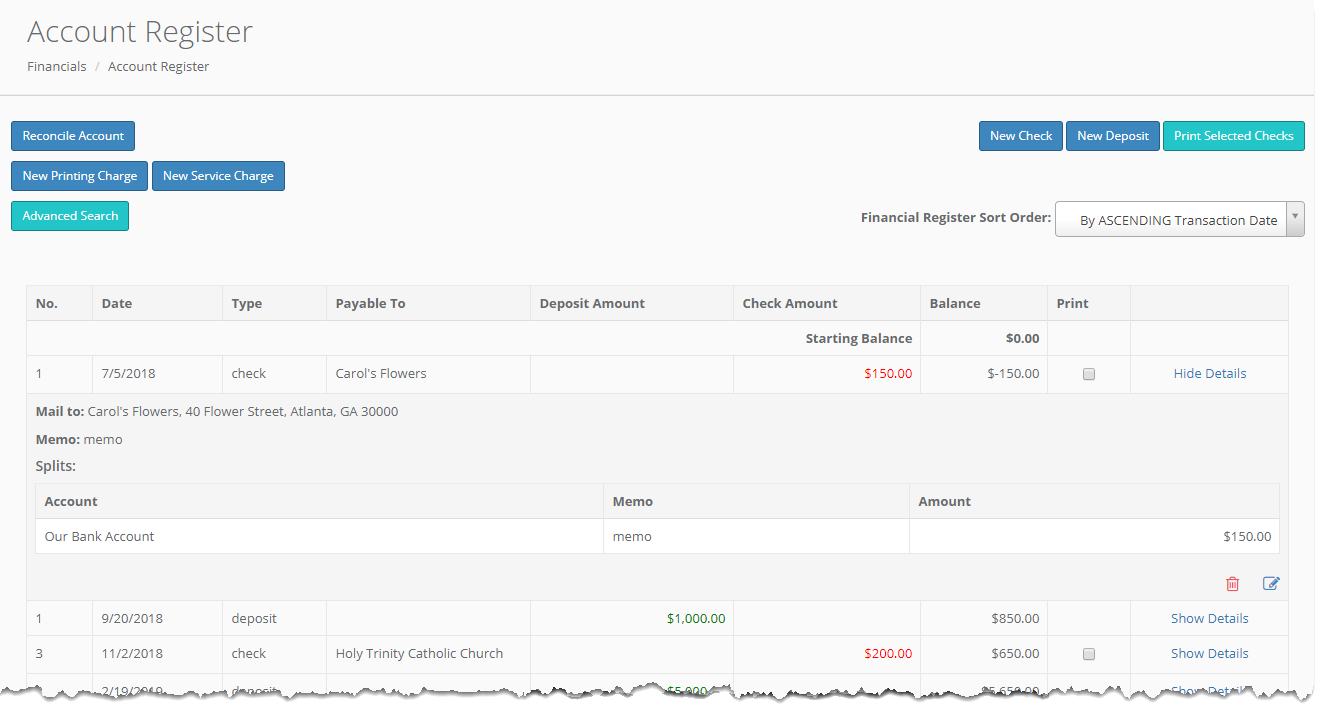
You can enter, delete, edit, print and view the details of your checks and deposits from this screen. You also have the ability to enter printing and service charges. Use the Sort option to order by Transaction Date.
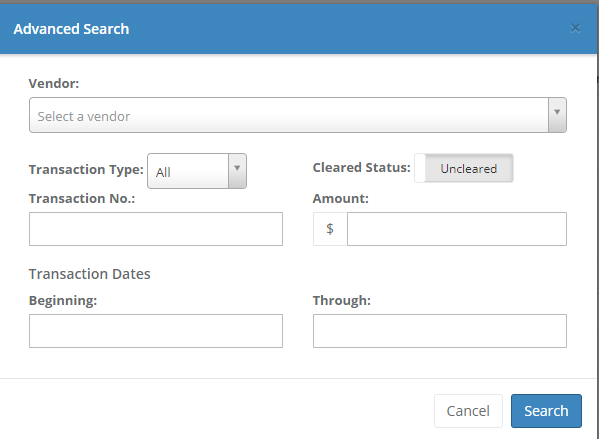
The Advanced Search Button allows you to search your transactions by vendor, type (check/deposit), Status (Cleared/Uncleared), transaction number, amount, and/or date range.
New Check
Click "New Check" to enter a new check.
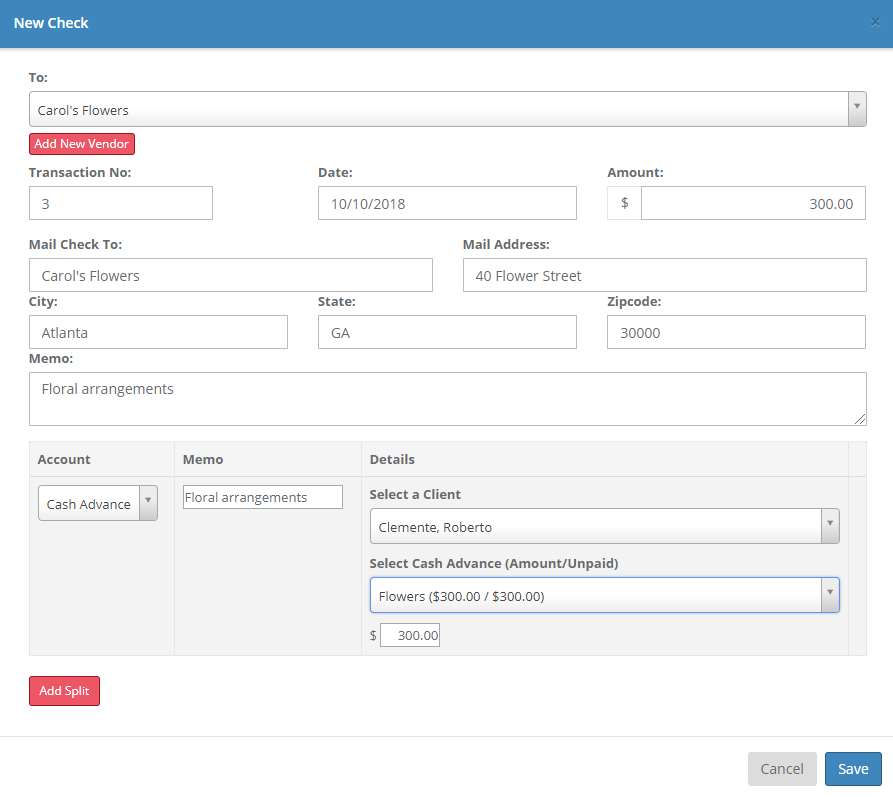
Select a vendor from your list of vendors or add a new vendor from this screen. Your transaction number will automatically fill sequentially based on the previous transaction number.
Select an account from your Financial Accounts (these are maintained in Admin > Financial Maintenance > Financial Account Register; see the Financial Accounts Register article for more information). If the account is configured to use for cash advances, you will be required to select the client for the cash advance. Any clients with existing cash advances will appear in the dropdown list of clients that you may select from. You will then have a dropdown with that client's cash advances to select from. The total cash advance amount will display as well as the unpaid portion of the cash advance. Once you select the cash advance the unpaid amount will automatically appear as the amount, but you may change this by simply typing in a new amount.
If you want to classify different expenses on the same check, you have the option to add splits. Click the "Add Split" button to add a split and select the Account and enter a memo and split amount.
New Deposit
Click the "New Deposit" button to enter a new deposit.
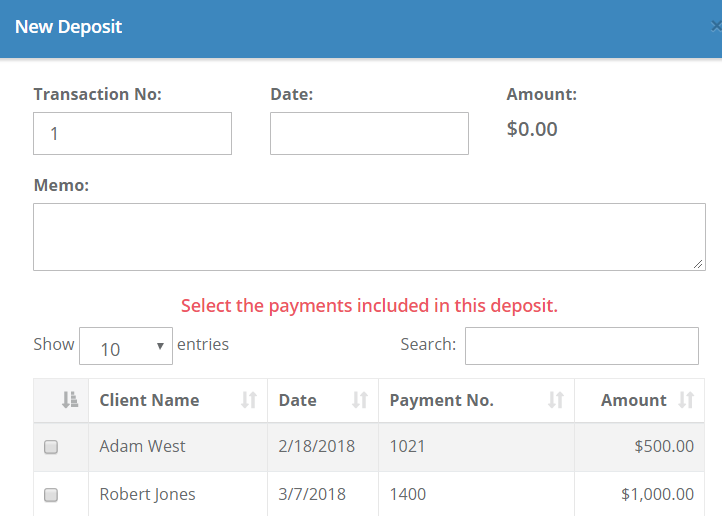
Select the payments included in the deposit and click "Save" to save it.
To print checks from your Halcyon system, you can select the checkbox in the "Print" column and click "Print Selected Checks". This will open a new printable tab with your designated print alignments (maintained via the Setup menu).
Print Selected Checks
You can print checks from the account register by selecting the checkbox in the "Print" column and clicking the Print Selected Checks button. Ensure that your pop-up blockers are off so the checks can open in a new tab. You can print this page onto your checks. If you need to adjust your print alignment you can do so from your Setup menu.
Reconcile Account
Reconcile your account using the "Reconcile Account" button.
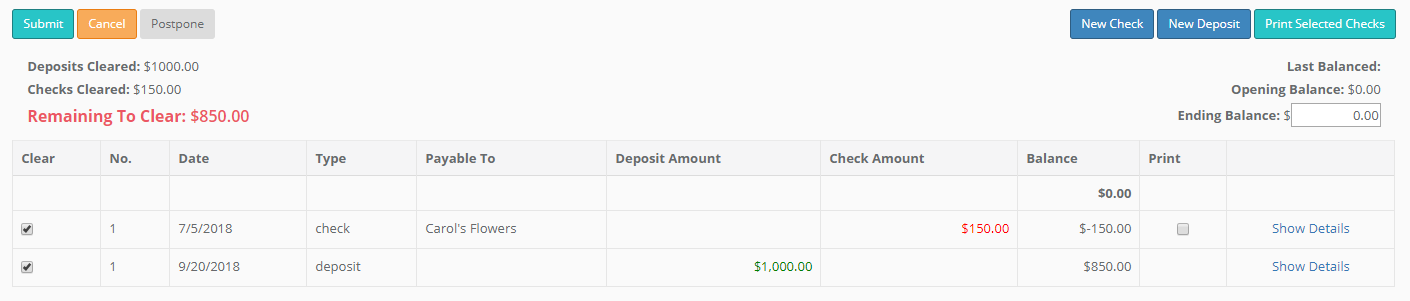
First, you will need to know what the account balance will be once the checks and deposits you plan to reconcile have been removed. Enter this in the Ending Balance input. Next, check the entries that you would like to reconcile. As you add entries, the Remaining To Clear value, show in red, should approach $0. Once you have checked all the entries you plan to reconcile, your new balance should match the Ending Balance you've entered, and the Remaining To Clear value should be $0. At this point, you can press "Submit" to reconcile your account.
You may also, at any time, click the "Postpone" button to postpone your reconciliation and save your selections so they will be available next time you click the Reconcile Account button.
Comments
0 comments
Please sign in to leave a comment.