You may transfer inventory products between your locations if you have multiple locations and have been configured with SuperAdmin. Inventory transfers between locations must have previously been set up via Admin > Product Maintenance > Inventory Transfer Locations. (See Admin > Product Maintenance Inventory Transfer Locations to configure your transfer access.)
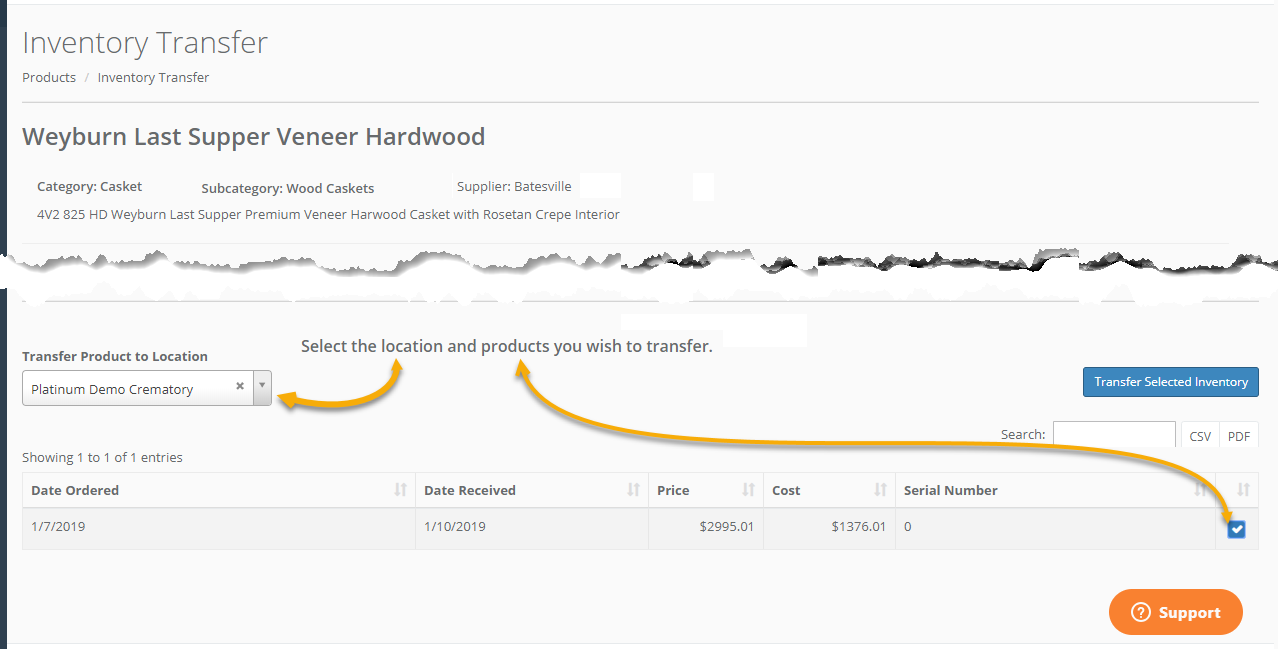
The inventory transfer is a one-way feature. A location can send (push) their inventoried items, but cannot draw (pull) inventory from another location. Your product list will have a green transfer arrow icon next to each product that currently has transferable items. Clicking the green transfer icon on the right will show you the full product details as well as all inventoried items for that product.
The drop-down for "Transfer Product to Location" will contain a list of all locations that have been enabled for transfer via the Admin options. Choose your destination location and one or more item(s) to transfer, then click the "Transfer Selected Inventory" button.
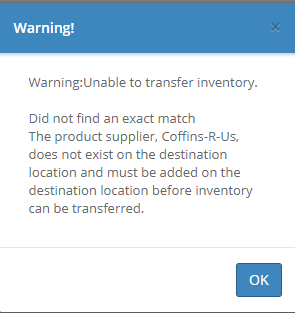
NOTE: The product's Category, Subcategory, and Supplier must already exist on the selected destination location. If they do not exist you will be shown a warning message listing what information must be added to your destination location before you can transfer items.
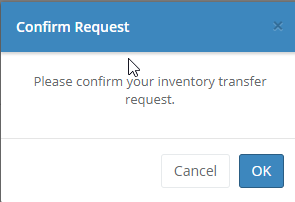
If there is an EXACT match of the product name on your destination location you will be asked to confirm the transfer request before the inventory is actually moved.
In the event that there is not an exact match of the product name you will be shown a list of all products on the destination matching the selected category, subcategory and supplier. This will allow you to transfer a product that does not appear or have a slightly different name at the destination location.
You may either choose one of the existing products to transfer the items, or create the product on the destination and add the items to the product.
Clicking the Add Product button will create the product as a new product on the destination location and transfer the inventory items as that product.
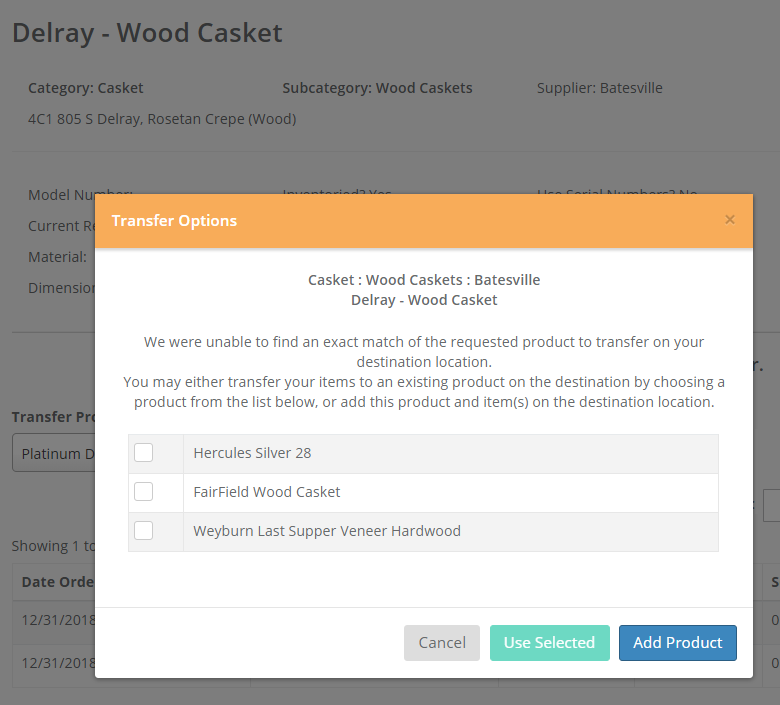
Selecting a product and clicking the Use Selected button will add the inventory items to the selected product on the destination location. In either case, the destination location will have a new product line.
Comments
0 comments
Article is closed for comments.