If you are currently a customer of Messenger you can send information from Halcyon to Messenger which will eliminate the need for duplicate data entry. There are two ways to send information from Halcyon into Messenger's Make It Personal (MIP). You can either use our 1) Integration with MIP or use the 2) File Export method. We will discuss both options below.
Integration Method
Connecting Halcyon to your MIP account
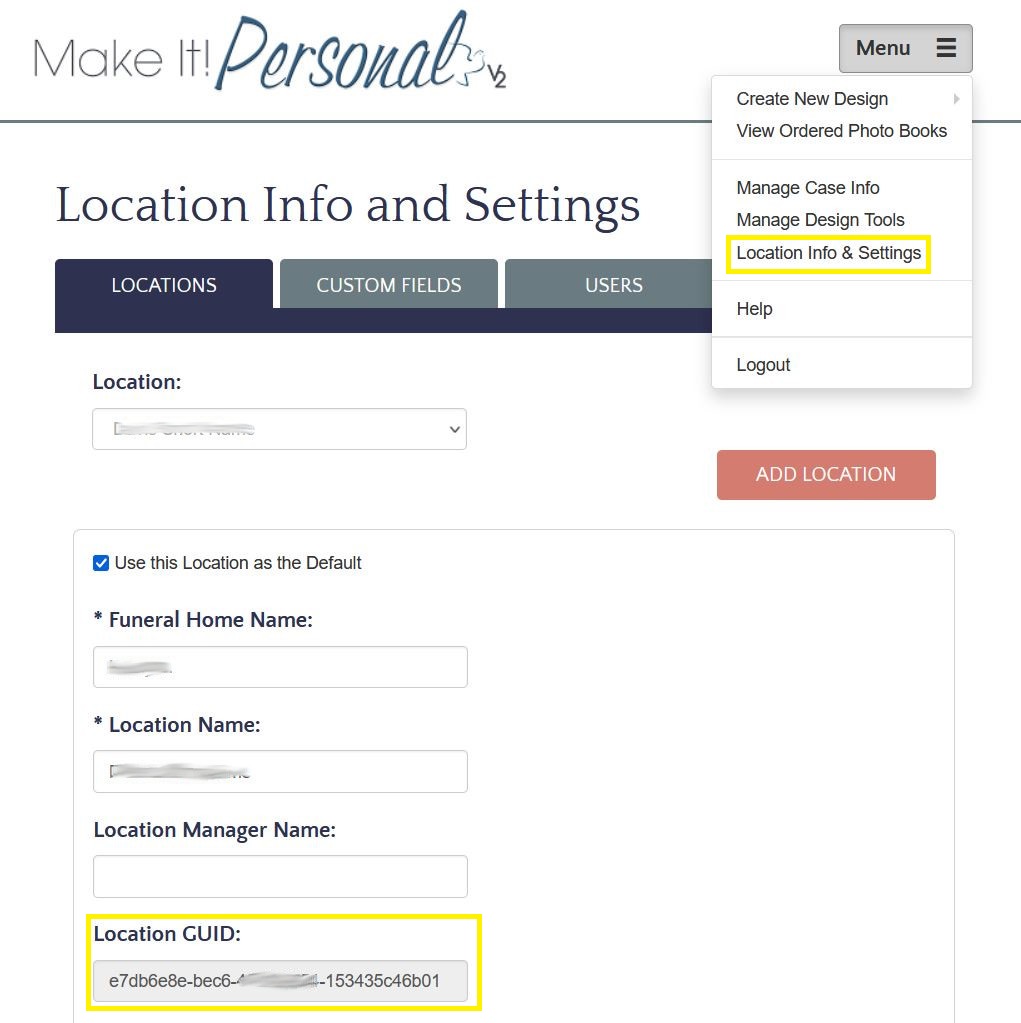
You will first need to connect your Halcyon location(s) to Messenger. Log into your Messenger MIP account and click the Menu icon on the top right and click the "Location Info & Settings". On that screen you will see a field for Location GUID. Copy the value for Location GUID.
Now log into Halcyon and navigate to the Utilities > Messenger's Make It Personal Integration.
At the top of the screen you will see a section that displays your current integration status for your location. If your Halcyon system is configured for multiple Servicing Branches you will see an entry for each branch. The example below shows a system that had two Servicing Branches.
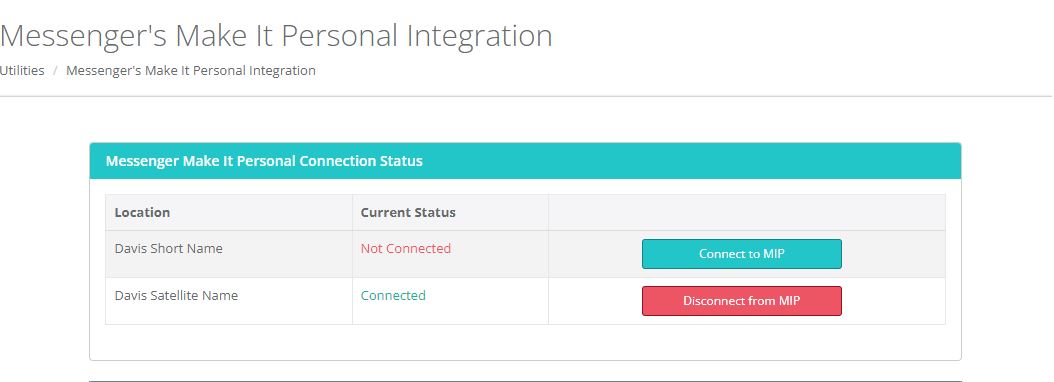
To connect a location click the "Connect to MIP" and enter the Location GUID and click Connect.
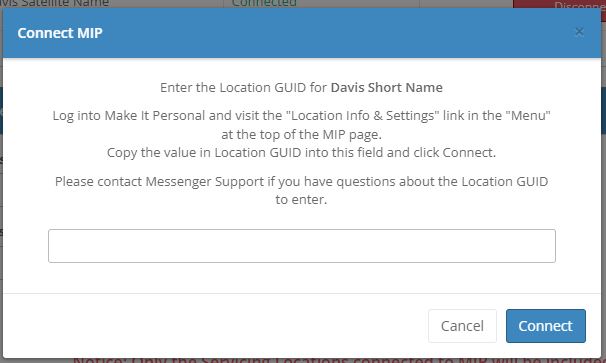
Repeat this process for each of your locations. Its important that you enter the Location GUID correctly. There isn't a way for Halcyon to check that it is correct at this point. If the value entered is not correct you may experience problems when you attempt to send case information to MIP.
If you need to modify your Location GUID you can simply click the "Disconnect From MIP" button and then re-connect.
User Access to MIP
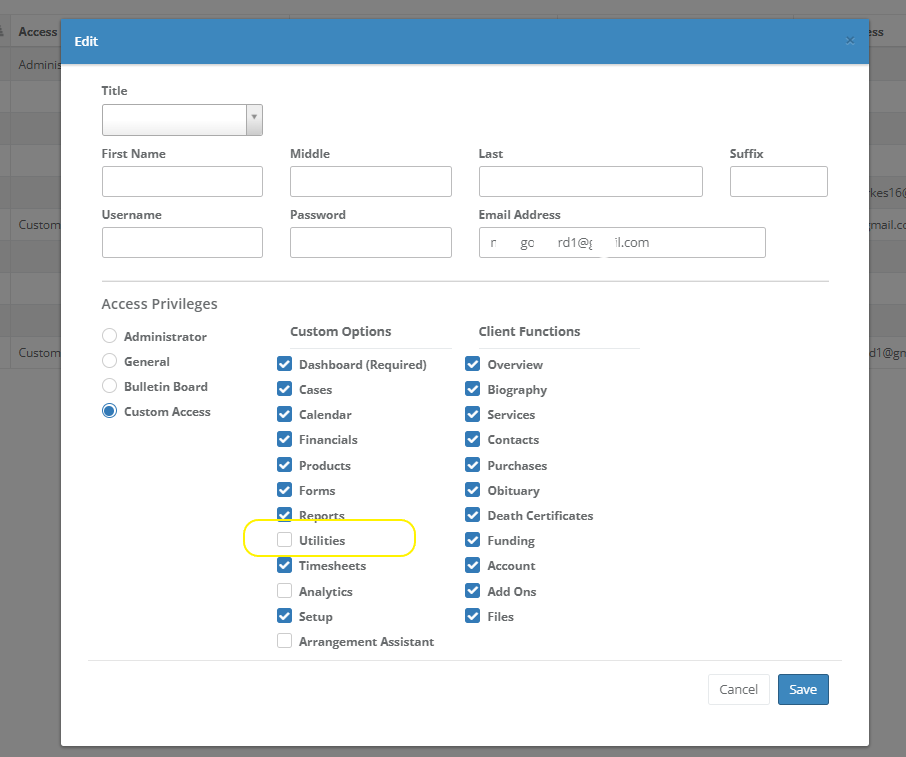
Users must have access to the Utilities screen in order to use the MIP Integration. Users that have been granted Administrative or General access privileges will have access to the Utilities screen by default. If a user is configured with Custom Access they must be granted access to the Utilities page. Visit Admin > Staff Maintenance & Security > Staff Logins manage users and their access privileges.
Locating the Case to Send to MIP
When you have at least one servicing branch/location connected to MIP you will be able to enter search information for the case you wish to send to MIP.
The search will only look for cases that match your entered search criteria for Locations that are currently connected to MIP.
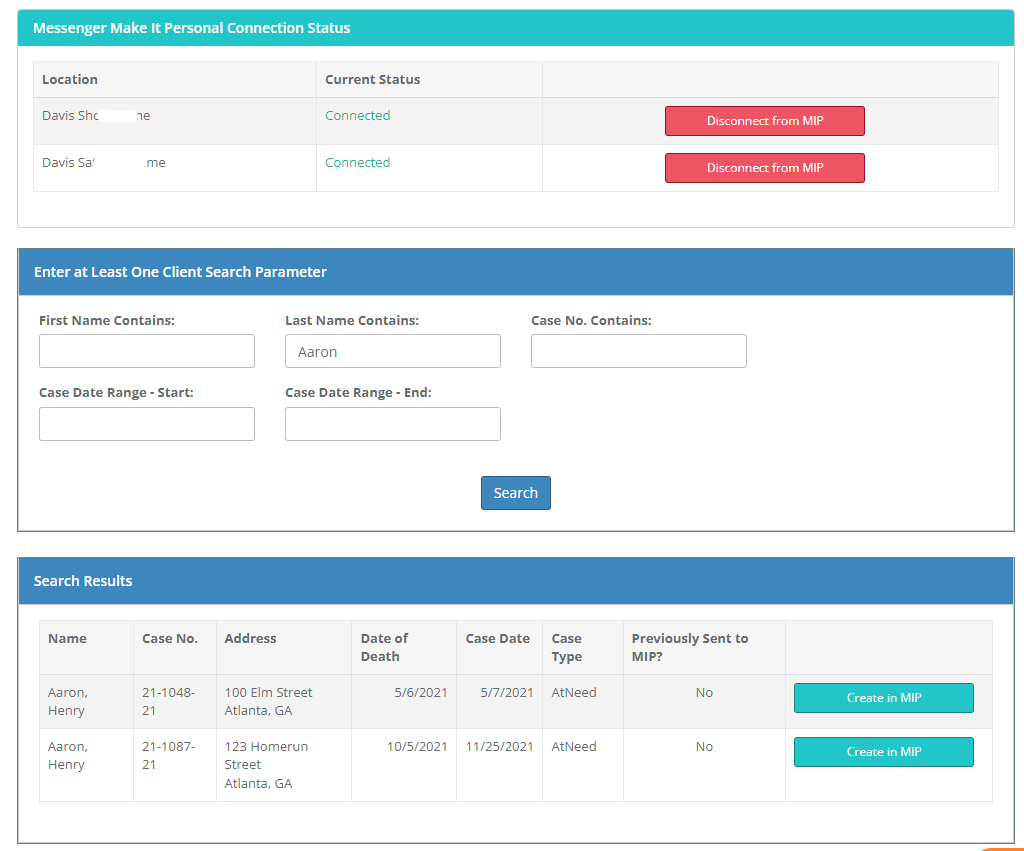
Click the "Create in MIP" button next to the Case you wish to send to MIP. You will have a chance to confirm before the Case is actually sent to MIP.
If the Case has been previously send to MIP you will see an orange "Update in MIP" button.

ALL case data that MIP accepts and any obituary photo currently in Halcyon for the requested individual is sent to MIP whenever you choose to create or update a record in MIP. If you have made manual edits to a case within MIP you may not want to update the case from Halcyon since it will overwrite the information.
An important note about the integration: Halcyon allows for more flexible Gathering Types and number of Gatherings than the MIP integration can accept. If we were not able to send a Gathering to MIP it will be listed in the Success message.

After the case is created or updated you may then log into your MIP account and Manage the Case. Please contact Messenger support for any questions regarding your Messenger account or technical support for the Make It Personal program.
Information that MIP will accept and that Halcyon can send via the Integration Method
- Name including Title and Nickname
- Gender
- Date of Birth and Date of Death
- Place of Birth and Place of Death
- Text of Obituary
- Obituary photo
- Spouse's Name
- Father's Name, if deceased and Father's Date of Death
- Mother's Name, if deceased and Mother's Date of Death
- Family Members
- Primary Service Information: (The Primary Gathering Location, Address and Date of Service)
- Primary Service Participant Names and Roles and Music
- All Visitations: Place Address and Start Time
- Gatherings with the Type containing the word "Mass", or "Rosary" or "Prayer Service"
- Pallbearers
- Disposition Type, Place of Disposition and Date and Time of Disposition
- Grave Section, Block, Lot
- Military Information: Service Branch, Rank, Date and Place Entered and Discharged
- Military Honors
A Note about limitations with relationships: The relationship types that Messenger will accept are specifically Father, Mother, Spouse, Brother, Sister, Son, Daughter, Grandchild, Grandson, Granddaughter - any contact relationship with a relationship not in that list must and will to be sent to Messenger as a relationship of "Other".
File Export Method
Note: If you are using the File Export Method we suggest that you switch to the Integration Method since we will eventually remove the File Export option.
Set the "form" called "Messenger MIP - Case Info Export" to be visible on your Forms Menu via Setup > Maintain Forms and Visibility. Once the form has been made visible you can click the link on the forms menu which will prompt you to select a client. Then click the Create button.
A file with the case information with a file extension of .xml will be created in your current default download folder on your computer.
Once the xml file is saved, log into Messenger and follow their instructions on how to import that file into their program.
Comments
0 comments
Article is closed for comments.